Automating Application Insights extension
Application Insights is a great service for finding out what is going on in your Azure Web Apps (or Function Apps). And to instrument a .NET or .NET Core application, you only need to enable a few Application Settings on your Web App. In this post I'll show what you need to set up.
I'll be using the Azure CLI to create and configure the resources, but you could just as easily use Azure PowerShell, or put all these settings in an ARM template (I'll show a sample later).
1 - Create a Web App and Application Insights
First of all, let's create our resource group which will contain an Application Insights instance, an App Service Plan and a Web App...
# create a resource group
$resourceGroup = "AppInsightsDemo"
$location = "westeurope"
az group create -n $resourceGroup -l $location

$suffix = "uieynsd"
# create an application insights instance
$appInsightsName = "app-insights-$suffix"
az resource create `
  -g $resourceGroup -n $appInsightsName `
  --resource-type "Microsoft.Insights/components" `
  --properties '{\"Application_Type\":\"web\"}'

# create an app service plan
$planName = "plan-$suffix"
az appservice plan create -n $planName -g $resourceGroup `
    -l $location --sku B1

# create a web app
$webappName = "web-app-$suffix"
az webapp create -n $webappName -p $planName -g $resourceGroup
If we navigate to the Web App in the Azure Portal, and click on the Application Insights tab, we'll see that Application Insights has not been enabled yet.

That's because we haven't told our Web App which Application Insights instance to use. Let's do that next...
2 - Connect to Application Insights
To connect the Web App to our Application Insights instance, we need to set the APPINSIGHTS_INSTRUMENTATIONKEY Application Setting on the Web App:
# get the application insights key
$appInsightsKey = az resource show -g $resourceGroup -n $appInsightsName `
    --resource-type "Microsoft.Insights/components" `
    --query "properties.InstrumentationKey" -o tsv

# set the key on our web app
az webapp config appsettings set -n $webappName -g $resourceGroup `
  --settings "APPINSIGHTS_INSTRUMENTATIONKEY=$appInsightsKey"
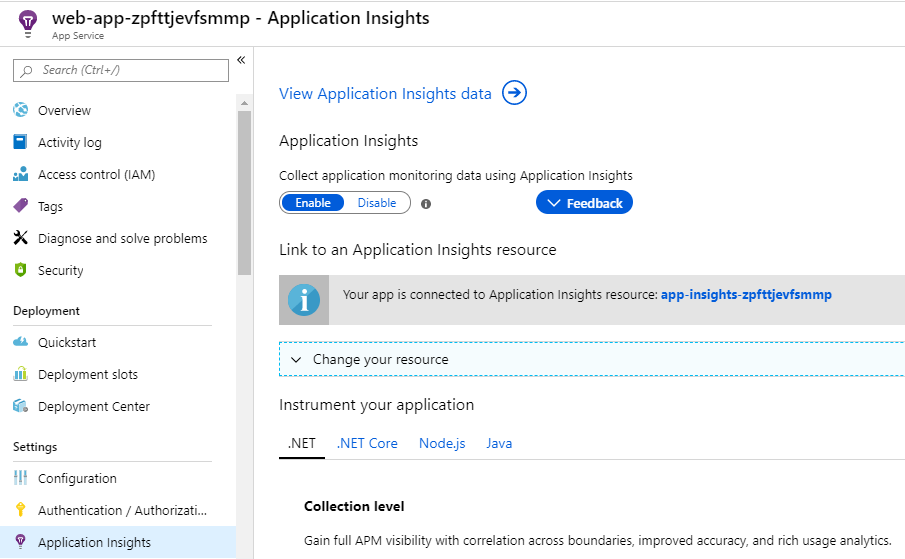
Now if we visit the Web App in the Azure Portal and click on Application Insights again, we can see that we have associated this Web App with Application Insights, but it looks like we're not quite done yet:

Here we're being promoted to enable the Application Insights site extension, which we could do by clicking the button in the portal, but how can we automate this? That turned out to be quite a difficult task, as I found all kinds of conflicting information on how to to enable this extension via ARM templates.
However, it turns out that it's as simple as setting a few more Application Settings on our Web App, and you can read the documentation for those settings here.
3 - Turn on the Application Insights extension
To turn on the Application Insights Agent extension, we need to set the ApplicationInsightsAgent_EXTENSION_VERSION to a value of ~2:
az webapp config appsettings set -n $webappName -g $resourceGroup `
  --settings "ApplicationInsightsAgent_EXTENSION_VERSION=~2"
Now if we go again to the portal, we can see that we've got Application Insights set up correctly:

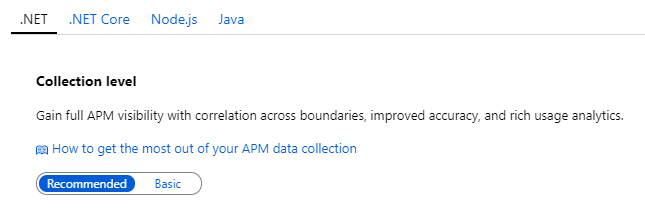
However, there are a number of configuration options that you can set in this UI, including what the default collection level is:

In our case, it's already set to "recommended", but if we wanted to explicitly configure that, we can set the XDT_MicrosoftApplicationInsights_Mode setting to recommended:
az webapp config appsettings set -n $webappName -g $resourceGroup `
    --settings "XDT_MicrosoftApplicationInsights_Mode=recommended"
4 - Tracing SQL commands
One unfortunate thing is that with the default settings the actual SQL commands that your application runs won't be visible in Application Insights.

Viewing the actual SQL can be invaluable when you're debugging a performance issue, but this behaviour is off by default as it has performance implications. However, if you do need to turn it on, then you simply need to set the InstrumentationEngine_EXTENSION_VERSION and XDT_MicrosoftApplicationInsights_BaseExtensions application settings to ~1:
az webapp config appsettings set -n $webappName -g $resourceGroup `
  --settings "InstrumentationEngine_EXTENSION_VERSION=~1" `
  "XDT_MicrosoftApplicationInsights_BaseExtensions=~1"
And now we we can see that SQL Command tracing is enabled for our site:

The ARM template way
Of course, you may prefer to use an ARM template, and so here's a snippet of the Web App resource from an ARM template that sets up all these settings automatically.
{
  "apiVersion": "2016-03-01",
  "name": "[variables('webSiteName')]",
  "type": "Microsoft.Web/sites",
  "location": "[parameters('location')]",
  "dependsOn": [
    "[resourceId('Microsoft.Web/serverfarms', variables('hostingPlanName'))]",
    "[resourceId('microsoft.insights/components/', variables('appInsightsName'))]"
  ],
  "tags": {
    "[concat('hidden-related:', resourceId('Microsoft.Web/serverfarms', variables('hostingPlanName')))]": "empty",
    "displayName": "Website"
  },
  "properties": {
    "name": "[variables('webSiteName')]",
    "serverFarmId": "[resourceId('Microsoft.Web/serverfarms', variables('hostingPlanName'))]",
    "siteConfig": {
      "appSettings": [
        {
          "name":"APPINSIGHTS_INSTRUMENTATIONKEY",
          "value":"[reference(concat('microsoft.insights/components/', variables('appInsightsName'))).InstrumentationKey]"
        },
        {
          "name":"ApplicationInsightsAgent_EXTENSION_VERSION",
          "value":"~2"
        },
        {
          "name":"XDT_MicrosoftApplicationInsights_Mode",
          "value":"recommended"
        },
        {
          "name":"InstrumentationEngine_EXTENSION_VERSION",
          "value":"~1"
        },
        {
          "name":"XDT_MicrosoftApplicationInsights_BaseExtensions",
          "value":"~1"
        }
      ]
    }
  }
},
 A place for me to share what I'm learning: Azure, .NET, Docker, audio, microservices, and more...
Comments
Thank you, just what I needed :)
[email protected]