Getting Started with Containers on Service Fabric
Service Fabric is one of several ways you can run containers in Azure that I explore in my most recent Pluralsight course. However, it can seem a little bit intimidating to get started with, so in this post I'll run you through the basic steps you'll need to get started with hosting containers on it, including all the information that I wish I had known when I tried this for the first time.
What is Service Fabric?
According to this promo video, Service Fabric is...
“Azure Service Fabric is an application platform that simplifies building and deploying microservice-based applications to provide organizations with scalable, agile and reliable applications, whether they are run in Azure, on-premises or in other clouds.”
So it's a platform designed for you to run microservice applications on, but those applications don't have to be containers, and they don't even have to run on Azure - Service Fabric works just fine on premises and even works on your local development machine. Your services can also run on Windows or Linux, making Service Fabric an incredibly versatile platform.
If you're wondering whether its a mature enough platform for hosting your own mission critical applications, its worth considering that Microsoft themselves have built many of their key cloud-based products on top of Service Platform, including Azure SQL Database, Azure Cosmos DB, Cortana, Microsoft Power BI, Skype for Business, and much more.
A lot of the articles and training material you'll find on Service Fabric focus very strongly on some of the powerful programming models it offers such as "stateful services" with "reliable collections" or the "reliable actor" model. And this initially led me to think that if you chose Service Fabric it meant you had to write your application using these models. But that's not the case. Although Service Fabric offers these as options, you can still use it to host applications using all the same techniques you are already familiar with, including containers.
Setting up a Development Environment
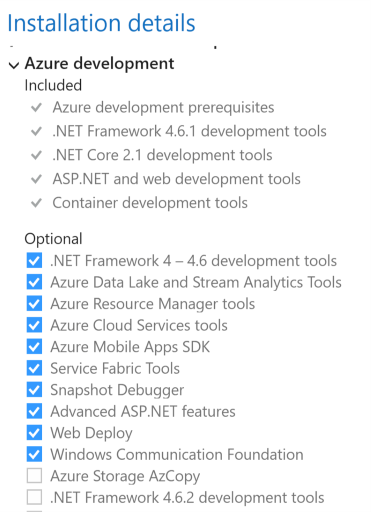
There are three steps to setting up your development environment for working with Service Fabric. First, using the Visual Studio 2017 installer, ensure you have the "Service Fabric Tools" option selected.
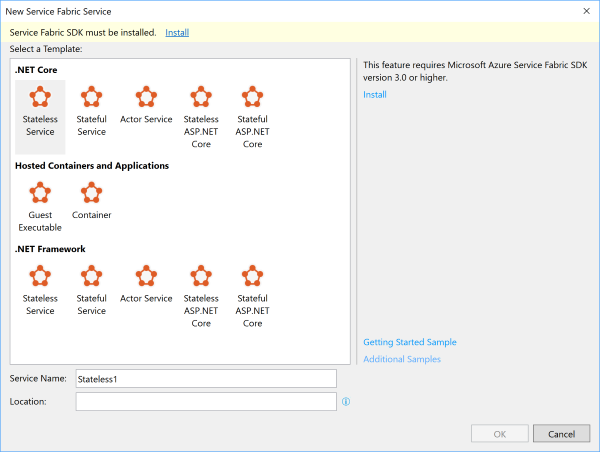
Once you've done this, there will be Service Fabric templates available when you create a new project, but you will see a warning telling you that you also need to install the Service Fabric SDK:
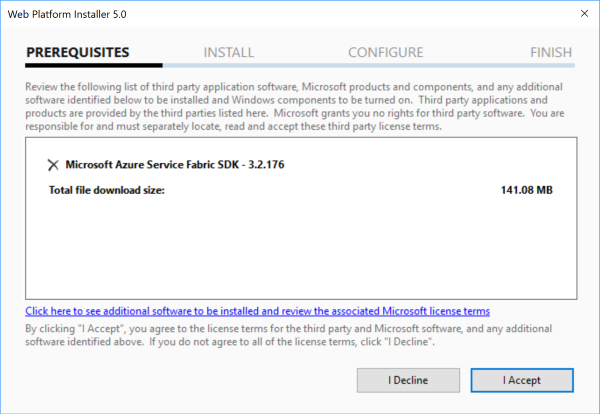
The dialog helpfully contains a link which will download the Web Platform Installer and launch it with the Service Fabric SDK ready selected:
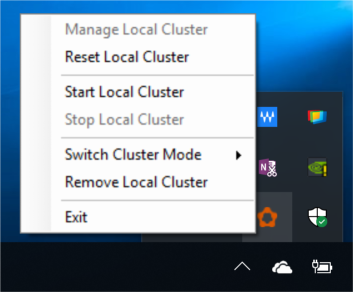
Once you've got this installed, you'll actually have the ability to run a local Service Fabric cluster on your own development machine. There is a new system tray icon that you can use to start or stop that container.
Two additional important things to remember.
First, you'll need to run Visual Studio in Administrator mode when you want to work with your local Service Fabric cluster, as it needs administrator privileges to make some configuration changes to the cluster.
Second, if you want to run containers, you will also need to ensure you have Docker for Windows installed.
Creating a cluster
To run a containerized Service Fabric application we need a Service Fabric cluster, and the good news is that we already have one on our development machine courtesy of installing the Service Fabric SDK. But in this post, I'm going to assume that you want to get your Service Fabric application running in Azure.
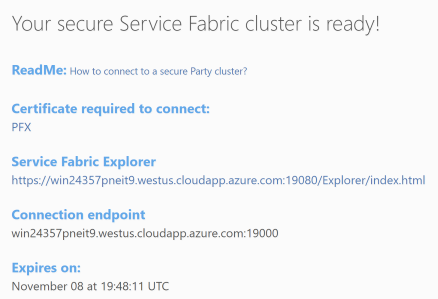
There are two ways to do that. First, is to take advantage of the brilliantly named "Party Clusters". This allows you to use a free shared cluster. Just sign in, pick whether you want a Windows or Linux cluster, and you'll get connection details including the certificate to deploy to it and access the dashboard.
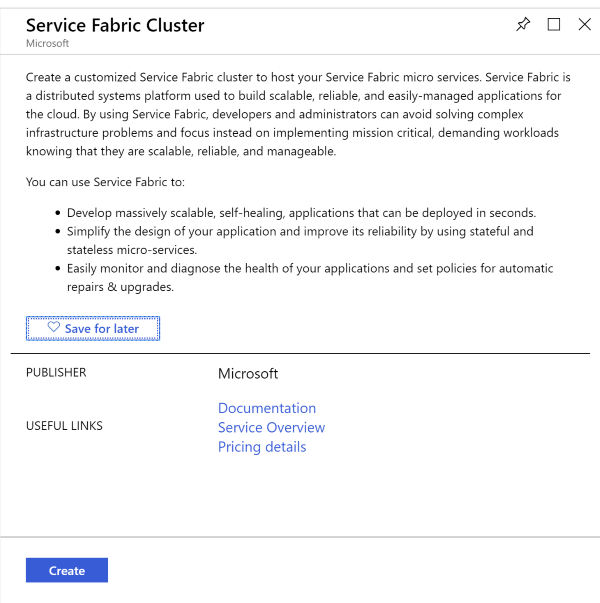
But you can also create your own cluster in the Azure Portal. First create a new resource and search for Service Fabric Cluster
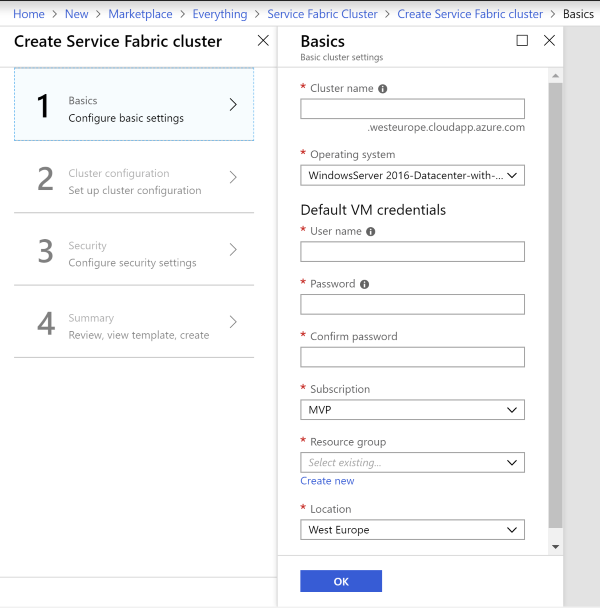
Then you need to provide basic information such as a name for your cluster and credentials for the virtual machines
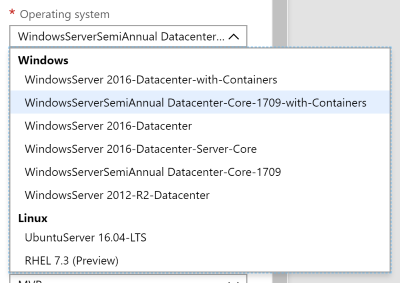
You also need to select an operating system. Make sure you choose one that supports containers if you're running Windows containers.
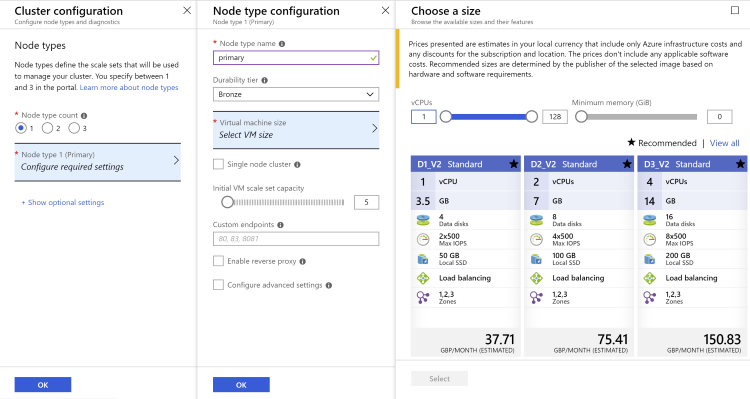
Next you're specifying details of the nodes in the cluster. You can pick the Virtual Machine size (note that you might need to select a VM that supports virtualization if you want to use the Windows Hyper-V container mode). And you can pick the initial number of machines in your cluster. At this point you can also select the ports you want to open up for your application and it will automatically set up the load balancer configuration.
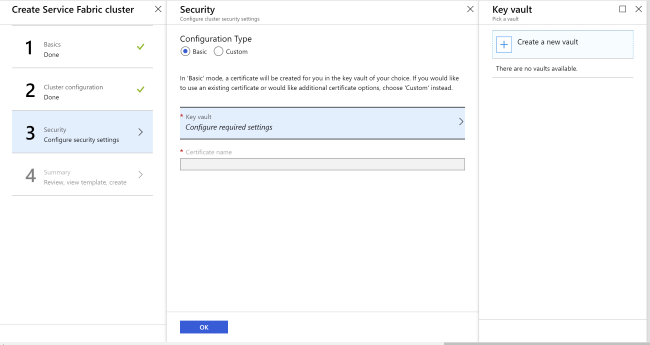
Then there's the security settings. And here we need to configure a certificate, that can be used to deploy to our cluster as well as to access the dashboard. The portal will offer to create a certificate for you in a Key Vault, as well as creating a Key Vault if you haven't got one. You can opt to use an existing certificate if you've got one you want to reuse.
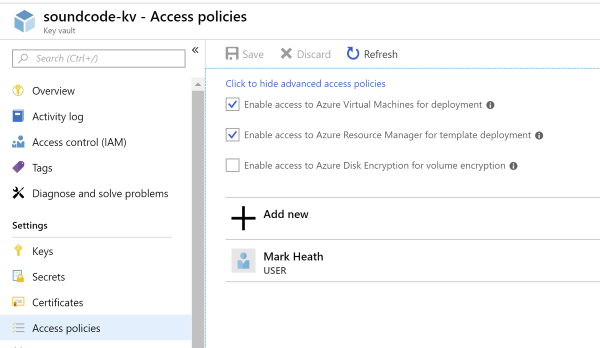
If you do create a Key Vault at this point, you'll need to set up the following Access Policies for this to work.
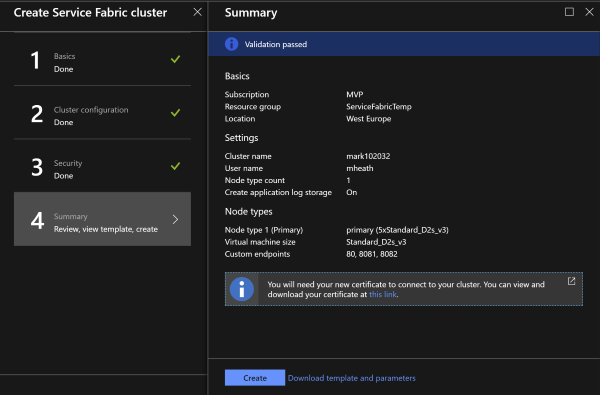
Once you've created the certificate, you should download it (the portal provides a link on the review page) and install it on your local development machine (it's easy to do: just double-click it once its downloaded and accept all the defaults - the password is blank).
With that done, we're ready to create a containerized app to deploy to Service Fabric.
Creating containerized services
For the purposes of keeping this post simple, I'm going to assume that we've already created all the container images we want to deploy, and so its simply a case of telling Service Fabric where to find them. Of course, it's equally possible for your Visual Studio project to contain all the code for each service, and to build the container images itself before deploying them to Service Fabric.
The first step is simply to create a new Service Fabric project in Visual Studio, and we need to choose the "container" option for our first service. To add additional services, just right-click click on the Service Fabric project in Visual Studio and click "Add new Service Fabric Service" again selecting "container".
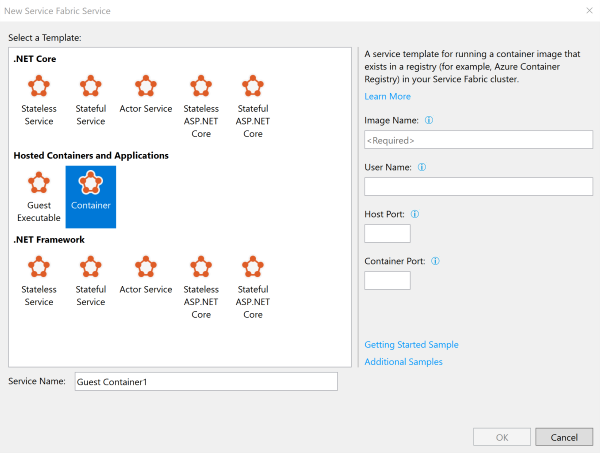
What you end up with when you do this is a single Service Fabric project in Visual Studio that contains a bunch of XML files. There is an "application manifest" which defines what all the services in your application are. And for each service you added there is a "service manifest".
These manifest files may need a bit of tweaking, but on the whole its fairly self explanatory what you need to do to change them.
To test this out, I created a very simple two service application consisting of a "front end" web application which makes a call through to a "back end" web API.
If you look at the ServiceManifest.xml for the front end web app you'll see that I've specified the ImageName which points to an image on Docker Hub (for simplicity - you can of course use private images hosted in Azure Container Registry), specified a couple of environment variables, and set up an Endpoint which determines the port on which we want to expose this service. Note that this isn't necessarily the same as the port the app in the container is listening on - it supports port mapping.
I've also got a very similar ServiceManifest.xml for the back-end web API
And then we need an ApplicationManifest.xml file to define our application. In here we specify what service make up the application. We can choose how many instances of each service we want (I just left it at the default which seems to put an instance on each node), and in PortBinding we connect the port the container is listening on to the port of the Endpoint we defined.
Notice also we can specify a ServiceDnsName that makes it super easy for our services to talk to one another. My web app container can simply call the backend service on "http://backend:8081".
Obviously there's a lot more depth that you can go into here, but that's the bare minimum needed to define a two container application. Next, we need to deploy it to our cluster.
Deploying and testing the application
One of the great things about Service Fabric is that you can run it locally, but deploying it to Azure is also very straightforward. When our Service Fabric project is created, there is a folder containing some "publish profiles", including a cloud.xml file.
What we need to do is update this to set the ConnectionEndpoint of the cluster we created (the default port to use for this is 19000), and fill in the thumbprint of the certificate we downloaded and installed. You can see my custom cloud.xml file here.
With this in place, its as simple as right-clicking the project and publishing within Visual Studio, just like you may be familiar with for publishing to other services like App Service.
Now if all goes well, our services will start up successfully and we can visit the web-page of our front-end application on port 8080 which was the port we opened up in the service manifest for our web app.
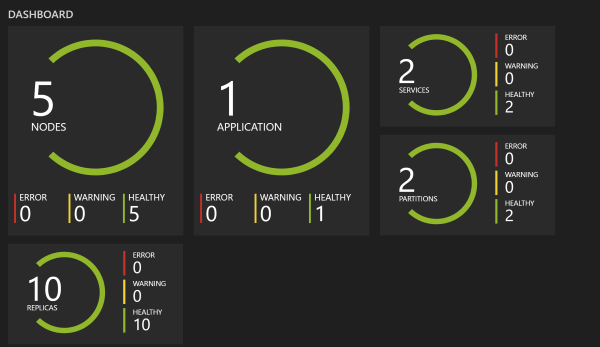
But Service Fabric also comes with a really helpful dashboard called the Service Fabric Explorer which is available by default on port 19080 of your cluster and is secured using the certificate we downloaded. When you load it you should see a nice visualization showing us details of the nodes in our cluster, the applications and services installed. Note that a Service Fabric cluster can be used for running multiple applications, so you can save money for your development and test environments by packing multiple applications onto a single cluster.
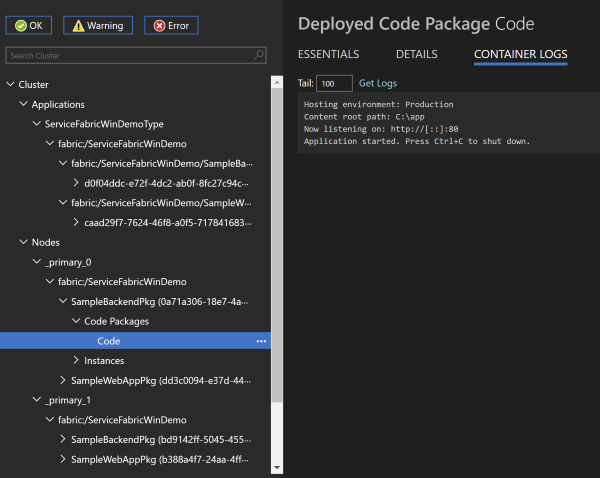
You can also navigate in this dashboard into the details of all the nodes and services, including drilling right down to see the container logs for an individual replica of one of our services:
If you want to deploy an updated version of your application, I found the simplest way was to update the service and application manifests, and update their version numbers in the XML before publishing again.
Demo code
If you'd like to try this out for yourself, then you can find all the code here on GitHub and you can also watch me work through this scenario in my Microsoft Azure Developer: Deploy and Manage Containers Pluralsight course.
Learning more about Service Fabric
Of course, there a huge amount to learn about Service Fabric, and this tutorial only touched on a few of the basics, so if you'd like to go deeper, here's a few resources I found helpful.
- Getting started with Service Fabric - video from Alex Mang
- Azure Service Fabric overview and the road ahead - Ignite 2018 session from Mark Fussell
- Understandingthe Programming Models of Azure Service Fabric - Pluralsight course by Ivan Gavryliuk
- Using Azure Service Fabric in Production - Pluralsight course from Ivan Gavyrliuk