Using OpenAPI Auto-Generated Clients in ASP.NET Core
Many of you will know that with ASP.NET Core, it's really easy to generate OpenAPI (Swagger) documentation. In fact, it's now a part of the default template for a web API. If you type dotnet new webapi you'll get a project that already references the Swashbuckle.AspNetCore NuGet package which will give you a nice webpage showing all the endpoints in your API and letting you test them easily
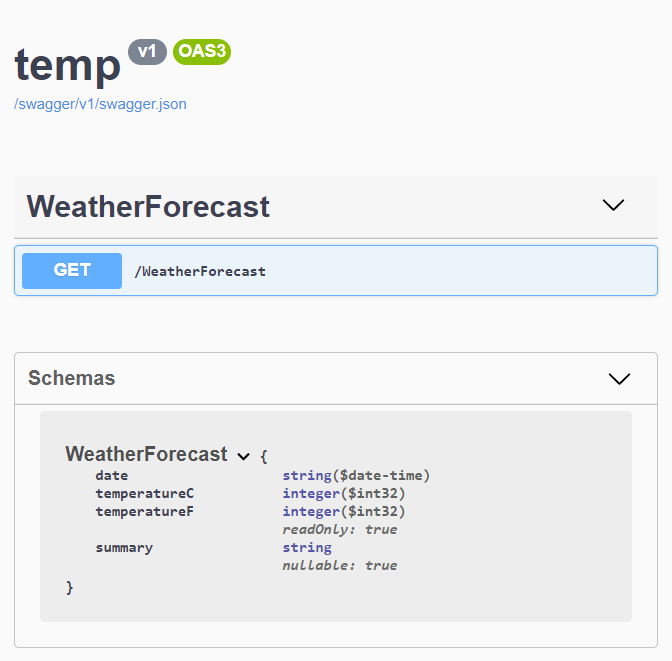
There's also a link on this page to a swagger.json document which describes your API in such a way that a client could be automatically generated from it.
Not this again!
Now, auto-generated clients is something that I've been burned by in the past. The tooling to generate them was often complex, painful to automate and resulted in ugly generated code that was never flexible enough to do what I wanted. And so I've avoided using it for a long time.
However, with the rise of gRPC, it seems auto-generated clients are making something of a comeback, and the latest Visual Studio can generate clients for both gRPC and OpenAPI sevices now.

I recently needed to make a quick demo app where one ASP.NET Core web application needed to call into an ASP.NET Core web API, and it seemed an ideal opportunity for me to give auto-generated clients another chance. It mostly was a smooth experience, but I did run into a couple of minor issues, so I thought I'd document my findings here.
Adding a Service Reference in Visual Studio
Adding a service reference in Visual Studio is very easy. Select the project in Solution Explorer and choose Project | Add Service Reference. From here you can choose whether to add a reference for an OpenAPI or gRPC service.
If you choose OpenAPI you have the option of either pointing directly to a Swagger document, or accessing one via a URL. I chose a local Swagger JSON file, which I'd saved to disk by visiting the Swagger page for my web API and downloading the JSON.
We'll discuss the configuration options shortly, but if just you accept the defaults you end up with something like the following in your csproj file:
  <ItemGroup>
    <OpenApiReference Include="..\api\swagger-v1.json">
      <CodeGenerator>NSwagCSharp</CodeGenerator>
      <Link>OpenAPIs\swagger-v1.json</Link>
    </OpenApiReference>
  </ItemGroup>
Customising the generated code
How do we use the generated client? Well, first we need to know what it's called. We can actually see the code if we navigate into our obj folder. In my example, the file was called swagger-v1Client.cs, and the name of the generated class was swagger_v1Client which was not what I wanted.
What's more, the names of the methods on the client were also not what I would consider to be intuitive names. So let's see a few ways to improve the generated code.
My first tip, is that your Swagger file should include an operationId for each method. This is achieved by providing a Name property in the method attributes in the web API. Here's a simple example:
[HttpGet(Name=nameof(Get))]
public IEnumerable<WeatherForecast> Get()
Second, in the csproj file we can specify a number of options. For example, we can control the class name, namespace, and output path of the generated file, by adding extra properties to the OpenApiReference node:
<Namespace>Weather</Namespace>
<ClassName>WeatherServiceClient</ClassName>
<OutputPath>WeatherServiceClient.cs</OutputPath>
Finally, there are two more things I want to change about the generated client. First, I want an interface, allowing unit tests to mock the client if necessary. And second, by default the constructor takes two parameters - a base URL and a HttpClient. The base URL gets in the way of us easily registering this client in our DI container, so I want to turn that off and configure the base URL a different way.
Both of these changes can be achieved by customising the NSwag options. (NSwag is the tool that is generating the client). The options I changed were setting /UseBaseUrl to false, and /GenerateClientInterfaces to true. And we can set these with an options property:
<Options>/UseBaseUrl:false /GenerateClientInterfaces:true</Options>
Here's what the full configuration in the csproj file looks like after these customizations:
  <ItemGroup>
    <OpenApiReference Include="..\api\swagger-v1.json">
      <CodeGenerator>NSwagCSharp</CodeGenerator>
      <Link>OpenAPIs\swagger-v1.json</Link>
      <Namespace>Weather</Namespace>
      <ClassName>WeatherServiceClient</ClassName>
      <OutputPath>WeatherServiceClient.cs</OutputPath>
      <Options>/UseBaseUrl:false /GenerateClientInterfaces:true</Options>
    </OpenApiReference>
  </ItemGroup>
Note that Visual Studio sometimes seemed reluctant to re-generate the client even though I had changed the options. Deleting the file from the obj folder seemed to get it working again.
Registering the client
The final step is that I want to use the AddHttpClient method in my Startup.ConfigureServices method. (Check out Steve Gordon's series on HttpClientFactory for more information on why this is a good idea).
This allows us to set the base address for the client after it has been created, fetching the value from configuration:
services.AddHttpClient<IWeatherServiceClient, WeatherServiceClient>(
    (provider, client) => {
    client.BaseAddress = new Uri(Configuration.GetValue(
        "WeatherServiceBaseAddress", "https://localhost:44369/"));
});
With this step completed, any controller or Razor page that needs to access the web API can just take a dependency on IWeatherServiceClient.
Comments
I was trying to use NSwag generated client once. There is NSwag Studio desktop app (Windows only) that allows you to setup all available options, by the way. And according to some answers in the internet, it might help with CI somehow.
aregazBut I ended up with my self-written API client since NSwag just didn't have enough flexibility for a couple pretty tricky cases.
yes, I still use self-written API clients in most cases, but its interesting to see the improvements that are being made for auto-generated clients
Mark HeathNow how do you do this in Rider with the OpenAPI specification plugin?
Davidafraid I don't use Rider, but don't see why the NSwag technique I showed wouldn't work for it
Mark HeathIn the latest versions adding Name to HttpGet with a custom Route throws an exception. I avoided this by adding Name to Route. Adding Name to generate the operationid is a really great tip. Without it the client method names are awful.
FrankAlso if you go for Name="[Controller][Action]" do so without underscore between them otherwise the name is truncated again
Hey Mark. Do you have any examples of how you are using this startup setup within your service or controller layer for .Net Core? The AddHttpClient works when I am just setting up a external httpclient but I am using OpenApi 3.0 that has endpoint methods etc. available that were generated.
Beantown AceI tried this then added the interface in the constructor of a service but the base address is not sticking its just showing localhost when I new it up. I am using OpenAPI 3.0 spec that has endpoint methods etc. available for the client that are built from the generation of the service stubs so I have a ICustomerApi and CustomerApi that if I hit it direct in my code it works with "var client = new CustomerApi([base address]).
If you want to use a different Client Generator, you can take a look at https://github.com/StefH/Re...
Stef HeyenrathWith this Visual Studio Extension you can generate a RestEase compatible client (Interface & Models) based on a Swagger / OpenApi or RAML specification.